Mothers often create outfits for their children. They are interested in how to sew a children's dress, what material to use, what style is best. And this is not all the questions that concern them. They are able to solve many problems on their own, but there are still topics on which you need to consult with someone, especially if you want to sew an outfit that is beautiful, stylish and, most importantly, the child likes.
If a mother knows how to handle a sewing machine, and at the same time she has cutting skills, she can sew a dress for her child on her own. This will save money, she will not resort to the services of a professional seamstress and look for ready-made clothes of the right style.
If the decision to sew an outfit with your own hands is finally ripe, you need to stock up
patience and suitable material. The first steps with which tailoring begins must be discussed with the daughter. Mistakenly, many parents believe that only they have the right to decide what style the dress will be sewn on. Children should take an active part in choosing the model of the future outfit. If a mutual decision is made, you need to decide on the material from which the dress will be sewn.
Due to the lack of experience, the child cannot completely independently decide on the fabric that is most suitable for sewing comfortable, beautiful and practical clothes. All responsibility falls on the shoulders of the mother. Before tailoring a baby dress, mom needs to make the right decision, but first explain everything to the child.
When all the pros and cons are weighed, the child was satisfied with the choice made, work can begin. In order for the process to be successful and give pleasure not only to the mother, but also to the child, you need to familiarize yourself with the rules of how to cut out a children's dress on your own.
The decision to sew a children's dress from fabric patches of various colors is extraordinary. To do this, you can use several options for different materials.
You can find examples of models on the pages of various magazines that publish popular patterns for children's clothing. You can also find inspiration for creating a beautiful outfit in the photos of the site.
The pattern can actually be prepared on your own.
- The model can be made one-piece and then more than one dress can be sewn according to this pattern. To do this, you can use a daughter's T-shirt of the appropriate size and a large drawing paper or other sheet of thick paper (sometimes a piece of wallpaper that was not used in the repair).
- To do this, you need to carefully put the clothes on the paper, smooth it and carefully outline the contours. In addition to the T-shirt, you can also use a T-shirt from the wardrobe.
- When drawing contours, special needles or pins are used.
- Pin the T-shirt to the paper, outline the contours with a needle, and further along the holes from the punctures, navigate where the bends will be located.
Pattern preparation steps
Clear contours make it easy to cut out a child's dress. When drawing, it is important to remember the basic rules:
- the part of the dress that goes from below should have a rounded shape;
- access to the armpits should be gradually expanded;
- in the shoulder area, the pattern is gradually beveled.
The place where the cutout for the head will be located does not have to be made according to a certain type. In this case, several options can be used.


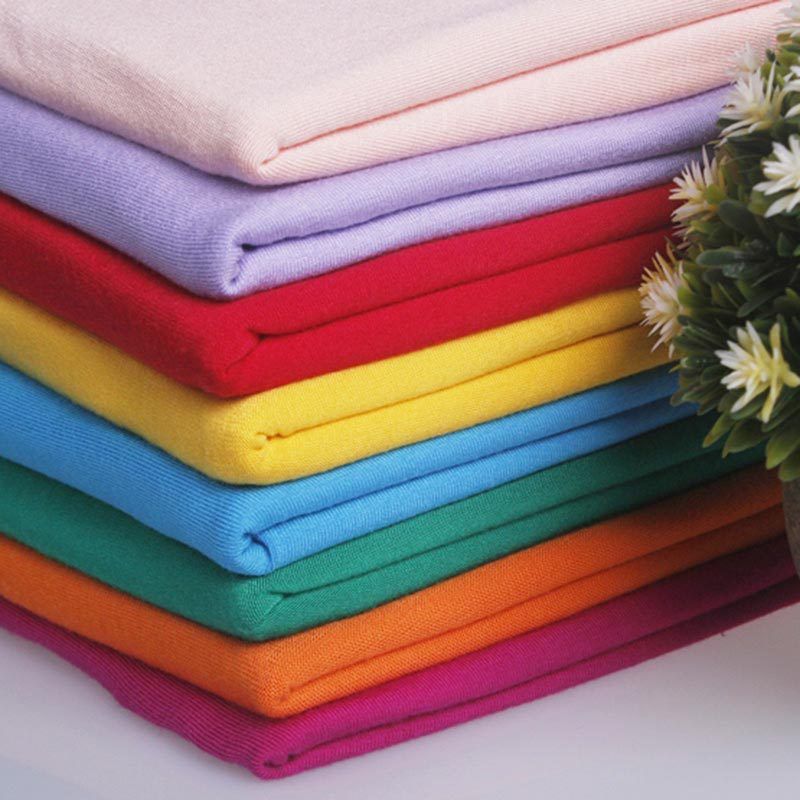
Material suitable for sewing a baby dress
When choosing a material, in the store you will find hundreds of colors and fabrics that are available in stock. They can be sorted out for hours. Below are a few basic rules that you need to rely on when choosing a fabric for sewing a dress.
- Starting the selection of the right material from which the child will have to sew a dress, you need to take into account the style of the future model.
When choosing a fabric, you should consider where the child will wear clothes: at home, on a walk, in a kindergarten, etc.
- When choosing a fabric, you need to remember that the child is growing, and if the dress is planned to be worn for more than one season, you need to buy a little material with a margin, which can then be used by lengthening the hem.
- After the dress is ready, the remaining pieces of fabric do not need to be thrown away, it is more expedient to save them in case of repair, because girls, although they are inferior to boys in activity, nevertheless, cases when they tear clothes are not uncommon.
- Cotton and knitted fabric can be used for sewing summer outfits, this material is easily ironed, while for warmer outfits, wool, wool blend and similar fabrics are used.
- From lightweight material, outfits are easily sewn, on which folds and tucks are provided. If, for example, you sew a dress for 10 years, then you need to take into account that at this age girls are already looking at their outfits like adult women: they pay attention to the model, style, and color of the fabric.


Sewing dresses with frills
The frills are made in such a way that the angle of inclination is 45 degrees with respect to the main thread. On knitted and soft fabrics, in order to save material, you can place threads along the line.
Before sewing, an allowance of several centimeters is provided for processing the cut and for the seam. You can not process the seam if the fabric used does not crumble, however, when washing in washing machine it may suffer a little and become more hairy. Stiff fabric on the frill will stick out.
 thick fabric
  Thin cloth
The calculation of the length of the frill should be made, based on the length of the cut, to be at least 1.5 times longer. If there is a good supply of fabric, it is better to make the frill a little longer, then it will be fluffy and easier to sew on.
- Before sewing a frill, it must be prepared. To do this, it is evenly placed around the entire perimeter, where it is planned to be stitched. And only then the detail using sewing machine sew to the place to which you want.
- You can pre-divide the part into parts. This will make it easier to work with her. The frill is preliminarily basted, after which it is inspected, the correct location is clarified, and only then it is sewn on with a machine stitch.
The frill can be additionally decorated with folds, however, this work is more complicated and requires a certain skill and patience.
This is done as follows:
- The part is pre-formed to mark the required number of folds.
- A small distance is set aside from the edge of the seam allowance, then it is separated and the size of the fold is determined, for example, 1.5 cm. The size is calculated so that the folds do not overlap one another.
- The collected folds are placed along the edge of the seam and then basted with large stitches.
- After the result is corrected and approved, the frill is machine stitched to the dress.


Flyaway cut processing methods
The edges of the dress do not have to be processed with the same sewing methods. There are several different ways to do this.

How to sew a simple dress for a girl - video
Jewelry that is used on children's dresses
Children's clothes just need to be decorated in some way, and this is especially important if these are girls' clothes. They use false flowers, bows as decoration, which are able to create style, harmony. Children's dresses, for which flounces are used at the bottom, can be divided into two parts with a bow or belt.
If mom is a real craftswoman, she can make flowers sewn from fabric for decoration. The task is rather complicated and time-consuming, but solvable.
For the manufacture of artificial flowers, fabrics that wrinkle poorly, for example, nylon ribbon, are suitable.
Assembly technology:
- It is necessary to fold a piece of fabric in half, inside out, then it needs to be basted or ironed.
- The sections are successively assembled either by hand or by machine seam and tightened as tightly as possible.
- Layers are sequentially disassembled, short - to short, long - to long, some towards the center, others - towards the edges.

If we do it the other way around, we get two different flower. In the first case, it will be the shape of a dahlia, in the second - carnations.
The simplest jewelry can be made without the use of threads and needles:
- Nylon tape is wound in several layers around the finger.
- The tube obtained in this way is removed, a piece of tape is pushed into the hole, which is tied.
- By distributing the ends of the ribbon, we get a flower. This type of jewelry can be disassembled for washing and re-made. You can attach it with a pin.
How to make a ribbon flower - video
To get the rose shape:
- Part of the fabric is folded into a tube, fixed with stitches.
- The slice that remains is collected and connected either by hand or by machine stitching.
- Along the fold, the parts are distributed at such a distance that they resemble flower petals in shape.
- The decoration itself can be further processed with beads, sequins. In the center you can put a small beautiful button or brooch.


One of the popular fabrics for making faux jewelry is organza. Rigid, it holds its shape well and does not bend. This type of fabric is made of nylon, so it is easy to clean it from dirt. After washing, the fabric dries quickly, it does not need to be ironed, and the cheapness of the material contributes to its popularity.
- You can make jewelry from any fabric, additionally processing the edge along the cut with a fringing or zigzag. In order to prevent the shape of the flower from falling apart, the fabric is additionally treated with starch, and when it hardens, it retains the relief of the decoration for a long time.
- Beautiful satin ribbon can serve as a great belt. Depending on the style of the dress, it can be fixed at the waist or under the bust.
- To decorate children's clothing, you can use ready-made accessories: bows, belts, brooches. Well-placed patch pockets of an unusual shape, with the use of matter of a contrasting tone, are able to highlight the outfit of a little fashionista in the general mass of children. Girls should understand that beauty and grace are those necessary things that are their hallmark.


When choosing the style you need for sewing, it is best to take a finished product as a basis, it is easier to create your own clothes. If this will be the first thing sewn by yourself, you do not need to take on too complicated models. Over time, the experience will increase, and then it will be possible to try to realize any idea.
Train on the simplest models, choose children's dresses that you can easily sew and will not be disappointed in your work, and then very soon your beloved daughters will wear the most original and unique outfits.
For hot summer days, or for a warm group in kindergarten, every girl needs light, weightless outfits. An excellent option would be a children's dress made of thin cambric with lace.
Here you can see the previously posted master classes on sewing children's dresses:
This dress is very simple in tailoring, but quite elegant due to the decor, it is suitable for both walking and visiting. First you need to determine the size of the child and print the pattern. Pay attention to the length of the dress, if necessary, the length can be cut to a larger size.
Dress pattern:
Patterns enlarge by clicking.
In addition to the pattern, we will need:
- cambric or any similar material;
- lace;
- threads in tone and contrast;
- oblique trim (can be made from the main fabric), ribbon or lace;
- pins, needles, scissors, chalk;

How to sew a children's dress with your own hands - Master class:
Having glued all the sheets of patterns, we see three details - the front, the back and the shuttlecock. We fold our fabric with the right side inward and, observing the fold line, pin the front detail.

We cut out the detail of the front with allowances for all sections, except for the armhole. Cut out the back the same way.

The shuttlecock will consist of two layers - fabric and lace. First, cut out the shuttlecock from the fabric. By the way, if you move the fold line further, lengthening the pattern, you can make a larger shuttlecock and pick it up.

We need two shuttlecocks, so we cut out one more of the same detail.

According to the pattern of the shuttlecock, we cut out the details from lace, only a little wider.

If the lace has a certain pattern, pay attention to its direction. It is better that both front and rear parts are the same. The same goes for length.

All the details are ready, now consider how to sew a children's dress with your own hands according to the master class below.
We circle the lower edges of the flounces from the fabric with a zig-zag stitch.

Now we baste the flounces from the fabric to the lace.

We sweep the edge with a large zag-zag.

Now we take the frills to the details of the front and back.

According to the basting, sew with a straight line.

And we sew each edge again with a zigzag.


Let's do the side seams. Pin the pieces facing each other with pins. You can additionally chop off the joints of the shuttlecocks.

We sweep the details together.

And for accuracy, we sweep with a zig-zag line.

Now, with the help of a centimeter tape, measure the armhole.

From the main fabric we cut out a slanting inlay slightly longer than our measurements. Width 4 cm.

Iron both edges inside.

So it will be much more convenient to work with the inlay. We take it to the armhole.

And sew with decorative stitching.

We will make drawstrings in the upper part of the front and back. To do this, fold the edge of the front part and sweep it.

We will do the same with the detail of the back. The indent should be about 2 cm so that the tape or braid can pass through the drawstring without problems.

We sew according to the basting, securing our drawstring. Take a ribbon, braid or lace. You can also use bias tape sewn in half.

We stretch the inlay through the drawstring in such a way that a loop is obtained on one side.

Now let's get decorating. Usually lace is made from individual motifs that can be cut out. In this case, the motif is surprisingly similar to the wings of a butterfly. Cut out two of these wings.

We accept in right place.

And very carefully manually sew the details on the dress.

In the middle with white threads we embroider the body and antennae of the butterfly.

Can you think of different variants decor using this base for the dress. I am sure, if you wish, you can also sew a children's dress with your own hands.
A loose and extremely simple dress will be a godsend on hot summer days or in winter in a warm kindergarten group.


Undertaking to sew a children's dress, you should take into account many different nuances. If you are good at sewing, then it will be easy for you to create any desired model based on a simple pattern. If you are just starting to sew and want to create the most adorable baby dress, then our tips will come in handy. Today fashion designer Natalia Starostina will help us with this.
Hello, Natalia. We are very grateful for your help. Now you can find a variety of patterns. But sometimes the pattern of the desired model cannot be found, or the suggested sizes in the finished patterns do not always fit the figure of the child. We would like to review some children's dresses with you.
Tell me, please, what fabrics are better to choose for sewing a casual children's dress?
Natalia's answer: First of all, children's clothing should be comfortable and comfortable for the child. Children are very mobile, it is almost impossible to make them sit in one place, they will always find something to do: drawing, modeling, playing in the yard or in kindergarten with other children. Therefore, for sewing a children's casual dress, it is best to use natural fabrics: cotton, linen, wool, or their combinations with synthetic ones, and natural fibers should prevail in the composition of the fabric. All natural fibers are hygroscopic and breathable, the child will not run wet, will not catch a cold and will not overheat. Synthetic fibers give the fabric strength, abrasion resistance, while maintaining appearance and product shape.
Equally important is how the fabric that you plan to use for sewing a children's dress looks like. I would advise to give preference to bright colored fabrics, with printed children's patterns. Children love everything bright and varied, bright colors, prints from the characters of their favorite cartoons, bright toys, fairytale heroes and just bright colored spots will awaken your baby's imagination, cheer you up, and your child will look more noticeable on the street.
In addition, it is necessary to think about the care of the product during operation. When choosing a fabric or knitwear, make sure that the material does not shed, it is very easy to check. Rub the fabric of your choice with a damp white cloth, such as a handkerchief, if the color is not imprinted on it - everything is in order. In addition, I would not advise choosing fabrics with a ribbed surface, with working out or jacquard for sewing children's clothes, as children are not very neat and often stain clothes. Such products are more difficult to wash, dirt lingers in the production, and if the product is intensively rubbed with the production, it loses its presentation. Prefer fabrics with a plain or satin weave, knitwear with a simple knit, knit is better.
Natalia's answer: In order to correctly calculate the fabric consumption, pay attention to the width of the selected material. In stores, there are fabrics and knitwear with a width of 80 to 220 cm. To sew a product, you need to take into account the length of the product, sleeve length, allowances for seams and hem, fabric consumption for details, pockets, hood, folds, belt and other trim, it is also necessary add to shrinkage. When sewing products from natural fabrics, especially inexpensive domestic ones, I would advise you to moisten the fabric in warm water before cutting and dry it. It will be very disappointing if your baby does not fit into the dress you sewed after it sits down after washing.
In addition, children grow very quickly, and it would be logical to provide for the possibility of adjusting the length of the product, adjusting the length of the sleeve, for example, with a frill or cuffs, and also repair the dress, in case it is necessary. Small remnants of tissue should be saved for such purposes.
The peculiarity of this dress is a fold in the front, which turns this seemingly simple model into a more interesting one. Could you give your comments on how to sew such a dress by changing the basis of the pattern.
Natalia's answer A: This is the easiest change. It is necessary to fold the fabric in half with the front side inward and measure the fold solution from the fold, from about 4 to 7 cm, draw a chalk line, sweep the upper part by 4 - 5 cm, attach the base pattern to the resulting chalk line and circle with chalk. Then cut out taking into account the allowances for the seams. You can also make a bow fold, or several accordion folds.
On cotton fabrics or knitwear, such a fold can be soft, on semi-woolen it can be ironed or fixed with a finishing line along the fold, in which case the fold will retain its shape even after washing.
In this children's dress, a special feature is the frill trim. How is a ruffled dress made?
Natalia's answer: Frills are usually cut obliquely, that is, at 45 degrees relative to the main thread. But to save fabric, you can also arrange them along the weft line, especially on soft fabrics or knitwear. When cutting frills, it is necessary to provide for a seam allowance and processing of the cut. It is acceptable not to process the cut if the fabric does not crumble, but when washing in a typewriter, the cut may become fleecy and lighter. On stiff fabrics, a straight frill will stick out.
The length of the frill must be at least 1.5 times longer than the cut to which it is sewn. In this case, the frill will not be very lush, and in some cases it may look short. If the fabric allows, it is better to make the frill 2 times longer than the cut to which it is sewn.
The easiest way is to make a frill assembled on a machine line. But before assembling the frill, it is worth considering the possibility for its uniform distribution over the part to which the frill will be sewn. Fold the frill in half, make a mark with chalk, a cut or colored thread, then both halves in half again, and mark. Then, on the side with marks, sew 2 parallel stitches with an increased stitch length. The lines must be collected by pulling the thread and distributed, taking into account the marks along the cut of the part.
For convenience, the cut of the part to which the frill is sewn can also be divided into parts. Baste and stitch the frill, while making sure that the assembly is evenly distributed and that the corners of the fabric do not stick out from under the line. Along the edge of the part along the frill, you can lay a finishing line and iron it.
In addition, the assembly can be assembled in small folds, this process is more laborious and requires time and patience. Folds should be marked on the frill. Set aside the seam allowance from the edge, then mark the size of the fold, for example, 1 cm, then the fold solution, for example 1.5 cm. The fold solution is usually made no more than 2 times over size folds, otherwise the solution of folds will overlap one another, creating excessive thickness. The collected folds can be swept or fastened with a stitch, then basted on a part of the product, stitched and ironed.
The flyaway cut of the frill can be processed in several ways.
- Overcast with overlock. Many modern household overcasting machines are equipped with a stitch width adjustment function. Such an overcasting is easy to manufacture, the frill can be overcast with matching or contrasting threads, under the overcasting you can put a braid folded in half, a Lurex thread, a thin cord.
- If the overlock stitch width does not change, you can simply overcast the cut, fold it inside out by 0.5 cm and sew on the machine along the fold, or step back 0.5 cm from it. You can also hem the edge manually. The disadvantage of this treatment is that the inside of the frill is visible, if the frill is located on the bodice, it does not look very aesthetically pleasing. If the frill is located on the bottom of the skirt - such processing is quite acceptable.
In addition, the edge of the frill can be trimmed with stitched lace, sewing, braid. - Zigzag. It is most often used on knitwear and fabrics along the oblique. Zigzag visually makes the frill more magnificent, especially if you zigzag along the stretched edge of the frill.
It is simple to do. It is necessary to set the machine for a zigzag seam, moreover, than thinner fabric, the smaller the zigzag should be. The top side of the zigzag stitch should be even and neat, to achieve this it is necessary to adjust the tension of the threads. The strip of the frill must be folded to the wrong side by 0.5 cm, and stitched, the edge can be pulled, the more you pull the edge of the fabric, the more magnificent the folds of the frill will be.
After the zigzag is completed, the excess fabric (allowance) must be cut out with sharp scissors, while being careful and careful not to cut through the frill and damage the stitching.
Also, the edge of the frill can be trimmed with lace, ribbon, narrow braid, stitched in a zigzag. Iron everything. - Moscow seam. This seam can be performed by a person who knows how to lay even, neat lines on a typewriter.
This seam is done like this. The frill section must be folded inside out by 0.3 - 0.5 cm and a line should be laid along the fold at a distance of 1 - 3 mm, depending on the flowability and thickness of the fabric. Excess fabric (allowance) must be cut with sharp scissors without cutting through the main fabric and without damaging the stitching. Then you need to tuck the fabric again, so that the cut is inside the hem, and lay another line, preferably along the first one. You will get one straight line on the front side, two lines on the wrong side. Iron everything. - The edge of the frill can be finished with a piping. The edging can be in tone or contrasting. Bias binding for edging can be bought at the store or tailored on your own.
The edging is always cut obliquely at 45 degrees. Bias inlay is cut from 2.5 to 5 cm wide, depending on the width of the edging in the product, the thickness of the fabric and the method of edging.- Method 1. Attach the edging to the frill, from the front or wrong side. If the edging is stitched on the front side, it must be folded so that the sections are inside. Then sweep the edging along the front side so that on the wrong side the fold overlaps the stitching seam of the edging. Then lay a line along the seam of attaching the edging along the front side of the main fabric of the frill with threads matching the main fabric of the frill. Check the wrong side so that the fold of the edging is sure to hit the line along the entire length of the edging. Iron everything.
If the edging is stitched on the wrong side, it must be folded so that the sections are inside. Then sweep the edging along the front side so that the fold of the edging closes the machine line. On the edging on the front side, lay a machine line along the fold with threads to match the edging. Iron everything.
You can also use the snail sewing machine attachment for edging. - Method 2. Iron the edging twice inside out. Sew the cuts to the cut of the frill from the front or wrong side. Wrap the frill with a piping and stitch as above, iron. To perform edging in the second way, the width of the oblique inlay must be larger.
- Method 1. Attach the edging to the frill, from the front or wrong side. If the edging is stitched on the front side, it must be folded so that the sections are inside. Then sweep the edging along the front side so that on the wrong side the fold overlaps the stitching seam of the edging. Then lay a line along the seam of attaching the edging along the front side of the main fabric of the frill with threads matching the main fabric of the frill. Check the wrong side so that the fold of the edging is sure to hit the line along the entire length of the edging. Iron everything.
- The frill can be made in 2 layers of fabric. It is very simple to perform it, you need to fold the frill with the wrong side inward and iron it, then lay the lines for assembly along the cuts. If the fabric is very wrinkled, it is worth laying the finishing line along the fold, this will facilitate ironing after washing.
In addition, a double frill can be made with piping nested between the cuts, a frill can be made with scalloped zigzags using a special stitch on a typewriter, or scallops can be sewn.
In this dress, flounces give special originality to the model. The model with flounces is very popular. Please tell me how to make them.
Natalia's answer: Shuttlecocks are cut in the form of a ring, in this case the circumference of the inner side of the ring corresponds to the length of the cut of the product to which the shuttlecock will be sewn. Such a “sun” shuttlecock, quite lush, creates beautiful coattails and has no stitching seams.
But you can also make a shuttlecock in the half of the "ring", "semi-sun", to save fabric. In addition, the shuttlecock can be made very lush and voluminous, in 2-4 suns, this, of course, is not for everybody, but maybe someone will be interested in this option.
Calculating a shuttlecock is very simple; knowledge of geometry for a school course will be useful for this. Circumference formula: 2*3.14*R, where R is the radius of the circle. For example, a waist of 50 cm will be processed with a "sun" flounce. 50=2*3.14*R, where R=50/6.28=7.96. That is, the radius of the inner “ring” of the shuttlecock will be 8 cm. If you build a “half-sun” shuttlecock, then the radius of the inner half-ring will be 16 cm. cm.
Wide shuttlecocks, made of heavy or highly stretchable fabric, should be hung during the day, having previously been doused with steam from an iron or sprayed with a spray bottle. After that, it is necessary to base the length of the shuttlecock and process it, so the shuttlecock will be less deformed, and the bottom of the shuttlecock will be even during the operation of the product.
The cut of the shuttlecock can be overcast with an overlock or bent 2 times by hand, on a typewriter with a “Moscow seam”, as described above, can be processed in a zigzag. At the same time, it is not necessary to process the cut of the shuttlecock with a zigzag pull, since the shuttlecock is built in a circle, the fabric sections along the oblique alternate with the fabric sections in a straight line, and the folds formed by the zigzag will be uneven. As well as a frill, a shuttlecock can be made in 2 layers, with a turned edge.
It is also possible to make a shuttlecock, which is cut in a spiral and forms a cascade when stitched. Such frills are used to create a frill, often in several layers, or vertically along the shelf in several rows, along the strap, vertically along the sleeve, for example, along the elbow seam. Such a flounce can be sewn to the smell of the skirt, to the side slit of the skirt, to the trousers along the side seam.
Some children's dresses are decorated with fabric flowers. Is it possible to create such flowers yourself?
Natalia's answer: Artificial flowers are a very laborious work that requires special tools, precise patterns, and skills to work with preserving the shape of a flower. It is much easier to buy ready-made flowers in a store; today there is a significant selection of artificial flowers, voluminous and embroidered, in retail chains.
But if you really want to make a flower yourself, you need to choose a fabric that does not wrinkle. The easiest way to make a flower is to use nylon tape. The simplest flower can be made without the use of thread and needle. Wrap the nylon tape in several layers on the fingers of the hand, then remove the resulting tube, insert the tip of the tape into it and tie it. When distributing the rings of the ribbon, you will get a flower that can later be disassembled, washed and reassembled, such a flower can be attached to a dress or hairstyle.
You can make a flower from fabric assembled on a machine stitch or hand assembled. Fold a piece of fabric in half inside out, and sweep or iron. The strip can be flat or taper towards one end. Slices are assembled by machine or manual assembly and pulled together as far as possible. Then arrange the layers sequentially, short in the middle, long along the edge. Or chaotic. In the first case, you get "dahlia", in the second "carnation".
You can make a rose. Roll a part of the fabric into a tube and secure with hand stitches, collect the remaining section for manual or machine assembly and distribute. Pull the fabric along the fold of the distributed part after a certain distance, creating “petals”. You can sew a bead in the middle, the flower can be trimmed with beads, glass beads, sequins.
The most common fabric for making simple flowers is organza. It is tough, so it keeps its shape well and does not wrinkle, it is made of synthetic fabric - kapron, so it is easy to wash and dries quickly, affordable, as it is inexpensive and comes in a variety of colors and shades.
To make a flower, you can use any other fabric, you can make a flower from a strip of fabric, processed along the cut with a fringing, zigzag, zigzag, made with scallops. Also, a flower can be made from a stitched strip of fabric, cut along an oblique, cut inward.
Most often, the shape of the flower is preserved with a thick solution of starch.
Tell me what you should pay attention to when buying children's dresses. Maybe there are some quality criteria?
Natalia's answer: For children's clothing, its utilitarian value is of paramount importance. Children's clothing, first of all, should protect the baby from the sun, wind, frost, snow, rain. Children's clothing should be comfortable, not hamper movement, it should be easy and simple to take care of.
Clothing worn on the body: underwear, dresses, shorts, T-shirts should be made of natural materials, cotton, with a small addition (within 20%) of synthetic threads to give strength to the fabric and maintain the shape of the product.
When buying a product for your child, turn it inside out. The seams on the products that you are going to purchase must be strong, with high-quality overcasting, flat, otherwise they can rub the delicate skin of the baby. For children under 1 year old, it is customary to make the seams of products on the front side.
Be sure to try on the product for a child. All children have a different build, and the size of children's clothing is based on growth. The most common problem is a narrow belt on a skirt or trousers, a tight elastic band, a small collar of the product, into which the child’s head does not fit well. During the operation of such a product, you will cause inconvenience to yourself and your baby.
When choosing a children's dress, pay attention to the appearance of the product. Even small children can evaluate themselves and their appearance. The child is pleased not with an expensive, stylish or fashionable thing, but simply with a bright beautiful new thing, he is still small to understand brands.
When choosing clothes for your baby, consider the care of this product, children are clumsy, fall, get dirty with food, paints, greens and flowers in summer. When choosing a new thing - think about where will he go your baby in these clothes. For a holiday, you can pick up light, even White dress, with ruffles or frills, with artificial flowers or puffs. It is better to choose a casual dress that is bright, not too expensive, not complicated in style, so that it can be easily washed and ironed.
Child dress must be sized. Some parents buy clothes for their children "for growth", to some extent this is justified, but it is more difficult for a child to move in a dress that does not fit, and it does not look beautiful.
When buying clothes, do not forget to consider the taste of your child. By purchasing products that your child likes, you can avoid morning conflicts with the baby, the child will be more willing to get ready in the morning Kindergarten, if it is beautiful, in his opinion, to dress up and more willingly go with you to the theater, for a holiday or for a walk.
Thank you very much for your help. Tell me where you work and how you can be contacted to place an order for custom tailoring of the most beautiful children's dress.
Natalia's answer: I've been doing custom tailoring for over 20 years. I sew to order dresses, blouses, tops, sundresses, corsets, skirts, trousers, shorts, jackets, vests, raincoats, coats, jackets for women, men and children.
The main part of customers who sew clothes to order are, of course, women. I try to sew the most beautiful, comfortable and unique dress for every woman, regardless of her age and build. I try to choose the style and material for each woman so that the new dress emphasizes the advantages of her figure and hides the flaws. I am sincerely happy when a client leaves me happy and with a smile.
I also develop my models in accordance with global trends, which I track every season on the world's catwalks. I love bright colours, eye-catching models that emphasize the figure, I like to put darts in the constructive seams of the product, creating a sculptural form of a feminine figure. I use numerous finishes, I really like finishing stitches, various scalloped teeth, buttons of various shapes, cord, braid, beadwork and glass beads.
I strive to create the perfect wardrobe for modern woman to meet her daily needs. My own established style can be tracked by the presented photos.