Experiences such as growing your own crystal will make you feel like a jack-of-all-trades—you'll learn how to make beautiful home decorations, sweet candies, and help your kids learn the basics of chemistry.
Use of crystals
Such an idea how to grow a crystal- this is a great opportunity to study the chemical properties of different substances. If you have children at home, be sure to challenge them to grow a crystal at home - not without your help, of course. It will be interesting for the children to observe the progress of work, comprehending chemical science in such an exciting way.
Some experiments will also help you get decorative details to decorate individual compositions - for example, salt crystals can be excellent decorating materials.
However, it must be remembered that many of the materials used are extremely poisonous - they should not be touched by hands or inhaled vapors. Such substances are unsuitable for use in everyday life - they can only be used for experiments.
Growing crystals can be chosen as a hobby, an exciting activity, because in fact the creator never knows what kind of crystal will turn out in the end.
Types of chemicals
At home, you can grow a crystal from a variety of substances. Some of them require special processing: you can work with them only under certain conditions - at a special temperature, lighting, etc. These include the following materials:
- Mohr's salt;
- blood salt;
- various alums;
- nickel sulfate;
- ammonium nitrate.

If you are just starting out with how to grow a crystal at home, it is better to postpone using them.
However, many work mixes, such as table salt, can be found in any home. With them, it is recommended to start work for beginners.
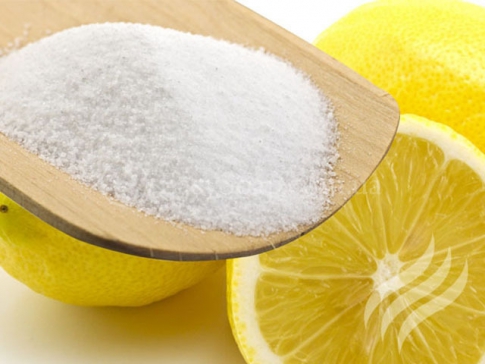
Salt
There is nothing easier than growing salt crystals at home!

You do not need to use any special accessories or set up a supernatural workplace to work with this product.
blue vitriol
Another easy option. Before growing a crystal from copper sulfate, the substance can be bought at an amateur gardener's store - it is sold as a fertilizer.

From the master classes below, you will understand that working with vitriol is as easy as growing a crystal from salt. The only difference is that the mixture is an active saturated salt substance, so it is undesirable to conduct experiments using running or any other water - only distilled water, which you can find in a pharmacy, is suitable.
Sugar
The only substance that can be eaten after the experience! Experiments with sugar are completely harmless, so you can safely teach your children how to grow a crystal, using his example.

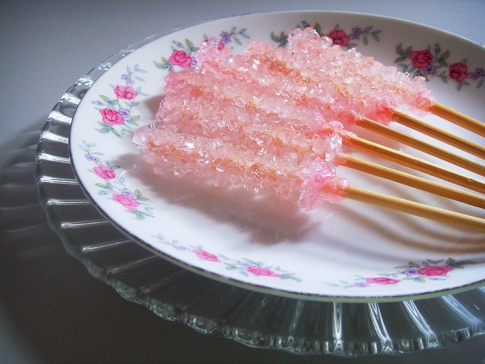
The result should be delicious sugar candies in the form of frosty crystals - an original replacement for cockerels on a stick.
Safety regulations
Despite the fact that novice chemists use mostly familiar solutions, such as salt or sugar, everyone must follow certain precautions - the instructions are presented below.
- Allocate special dishes for experiments, from which you will not eat in the future. Neglect of this point can lead to serious food poisoning.
- Each substance must be stored in a separate, hermetically sealed package with a mandatory signature of the contents on the bottle. Keep substances out of the reach of children and pets, in a cool and dark place.
- Use protective clothing and gloves.
- Work with chemicals that emit vapors into the air should be carried out only near powerful hoods.
- If acid gets on the skin, it is imperative to sprinkle the place with a weak alkali (water diluted with baking soda) and vice versa - alkaline solutions are easy to neutralize with an acid like citric acid.
Such skills are very useful when working with dangerous chemicals. Over time, you will bring the implementation of this instruction to automatism and will not worry when you want to use dangerous mixtures instead of ordinary salt or soda to grow a crystal.
salt crystals at home
After the theoretical advice, you can move on to the part where you will learn how to grow a crystal from salt. Prepare water in unlimited quantities - it is better to use distilled water (purified from any additives) so that the substance does not react with any impurities. However, ordinary running water will do.
In addition, you will need a small saucepan, a glass container (jar, glass), silk thread, a pack of salt.
- Place a saucepan of water over medium heat. Heat the water, but do not bring to a boil.
- In small portions, start pouring salt into the water, stirring constantly. Each time pour a new handful after the previous one is completely dissolved.
- The preparation of the solution ends when the salt has completely ceased to dissolve in water - this means that you have prepared a concentrated mixture.
- Pour the concentrated composition into a transparent glass container and leave to settle for about a day.

- Free time is necessary for all the smallest, undissolved particles to settle to the bottom. In the photo you can see how the salt precipitate is obtained.

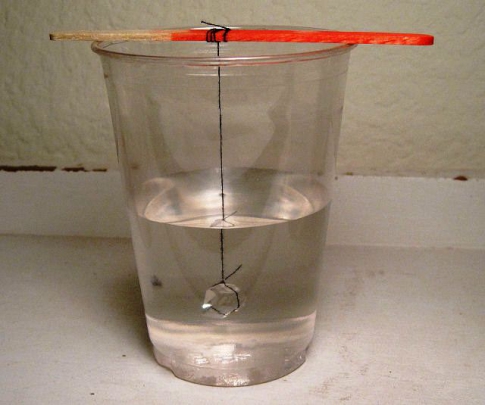
- Take a thread or string, tie it around a long thin stick that you can put on the neck of a glass container.

- The length of the lace should be less than the height of the vessel, so cut off the excess.

- Lower the string into the water in a suspended state so that it does not touch the walls of the jar and the sediment at the bottom.

- Leave the experiment in this state for 1-3 weeks.

- After a couple of days, you will notice an increase in small crystals on the thread. Experience in this case is interesting just by observing how much the crystal grows over a certain period of time.

- Instead of an ordinary thread, you can lower a large piece of salt suspended on a thread into a glass. In this case, the substance will grow around it.
You can either grow a crystal of a certain shape, or an arbitrary one. To control the appearance of the substance, apply a thin layer of grease or petroleum jelly to one side of the crystal - you will see that there will be no growth here.
If desired, salt can be replaced with other substances - for example, it is easy to prepare crystals from soda or copper sulphate using the same technology.
How to grow a crystal from sugar?
If you set yourself the goal of learning how to grow a crystal from sugar, you will be pleasantly surprised by the result - beautiful sweet candies that will delight children and pleasantly surprise adults during tea drinking. An interesting use for them is to stir tea with them. So you get both a stir stick and a sugar sweetener.
- Prepare a concentrated sugar solution in the same way as in the experiment with salt - the sugar should completely stop dissolving in warm water. After that, pour the hot syrup into a transparent bowl.
- When the solution is ready, start preparing the base sticks. Tie one stick to the other crosswise so that the first is lowered into the bowl, and the other is held by its neck.
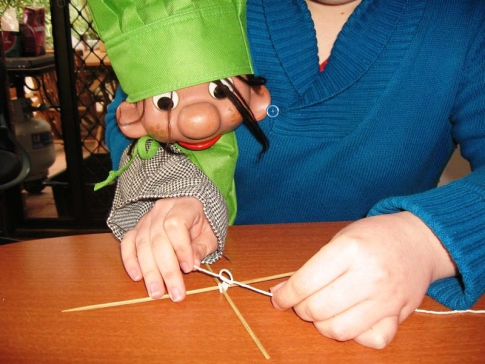
- Dip the stick in the syrup - it should not touch the bottom.

- Leave the structure in a dry and warm place - in a day you will notice how crystals begin to appear in the liquid.

- In about a week, you will have finished sugar skewers. Bon appetit!

If you want your lollipop to be colorful, add a little food coloring to each jar as you pour the hot syrup.
Such sweets can be a nice gift for your loved ones for the holidays - you can add such sweet sticks to a present for the New Year or Birthday.
To find out how to grow a crystal from blue vitriol, watch the following video.
Take it, tell your friends!
Read also on our website:
show more
An unusual experiment on growing crystals from salt can be done with children. This process is completely safe, as only salt and water is used and no additional reagents are required. Making such a craft with your own hands is quite simple, but you need to consider a few rules.
How to grow a crystal from salt - preparing the tool and material
Before you start making crafts, prepare the necessary tools and determine the place for the container. The maturation process of the product will take some time, while the dishes cannot be moved and tilted.
- The main component for the formation of a crystal is salt. To get a smooth and transparent surface on the craft, use sea salt. It does not have impurities and small debris, like table salt.
- Crystal formation will occur in water. It should also be well cleaned of impurities. It is best to pour distilled water or boil the liquid and filter.
- The utensils for the experiment should not be metal. Since it can oxidize due to the action of saline. The volume of the growing dish does not matter and is only limited by the size of the desired crystal.
- Keep the container free of debris and debris. They will prevent the growth of salt on the main crystal. Therefore, before the experiment, the dishes should be thoroughly washed and dried.
- As a base, you can use a thread, fluffy wire, dried twigs or a large piece of salt.
- In addition, you will need: a wooden spoon for stirring, a piece of gauze or a bandage, paper towels, colorless nail polish, a saucepan and a pencil.
How to grow a salt crystal with many facets
The initial stage of the experiment involves boiling the liquid. Therefore, help the children warm the liquid so that they do not burn themselves.
- Prepare 120 ml. purified or distilled water. Pour it into a saucepan, put on the stove and bring to a boil.


- Decide on the type of salt to form the crystal. So, with the help of ordinary table salt, the craft is formed within a few days, sea salt forms a crystal in 1-2 days, and with iodized salt, you will have to wait a very long time for the growth of the product.


- Prepare a saturated salt solution. You can understand its readiness by grains that could not dissolve in water. To do this, add salt to warm water and stir the solution thoroughly. First, add half a glass of salt. If the water is clear without grains, then add another quarter cup.

- Pour the solution into a dry and clean container. Make sure that the sediment stays in the pot, otherwise it will fall to the bottom of the jar, and will reduce the growth of the main crystal.


- At this stage, a dye can be added to change the color of the crystal. But do not add too much of it, as in large volumes the tool will make the craft brittle.


- Prepare the thread for the warp. It is desirable that it be thick with a rough surface. Tie it to a pencil or a long skewer. Their size should be larger than the diameter of the container for growing a crystal and with edges for stability.

- Measure the desired length of thread and cut it. Do not let it touch the bottom of the container.

- Position the pencil on top of the container. Make sure that the thread does not stick to the walls of the jar.

- Place the brine container on a flat surface. If you want to grow a crystal with large branches, then keep the liquid with the thread in a warm place. To form a crystal with smooth surfaces, put the container in the cold.


- Now you just have to watch the growth of the crystal.


How to grow one big crystal from salt
To get a large crystal with smooth edges after the experiment, it is necessary to use a slightly different technology.
- Prepare a concentrated salt solution as in the previous paragraph. Pour it into a container. But for this growing method, choose a flat and wide container. So a large crystal will not be able to connect with the rest, smaller parts.

- Leave the container with the solution for 2 days for the formation of small crystals. Then pour out the water and choose the most suitable piece for growing.


- Tie a small crystal to the fishing line. In this case, it is necessary to use a smooth thread or thin wire (fishing line) so that salt grains cannot be fixed on it.


- Prepare a saturated salt solution again. But this time, do not bring the water to a boil, but only warm it to room temperature.

- Lower the crystal on the fishing line into the prepared container and pour the saline solution in a thin stream. Secure the fishing line to the surface of the container with a pencil. In this case, the crystal should be located in the center of the container.


- Growing a crystal in this way will take much longer than the previous option. Therefore, every two weeks, prepare a new salt solution and be sure to filter it before pouring it into the container.
- When the crystals have grown to the desired size, remove them from the liquid, dry them and be sure to cover them with a thick layer of colorless nail polish. It will not allow water to evaporate, which will make the craft more durable for a long period.


It is very easy and safe to conduct an experiment on growing a crystal from salt at home. But to obtain the desired effect, strictly follow the rules specified in the article and do not forget about the finishing of the product.

Crystals are substances whose atoms or molecules are ordered. Such formations have a symmetrical structure in the form of polyhedra. Facets in crystals can be from four to several hundred, they vary greatly in size, but they always amaze with their “correct” beauty.
In nature, such formations are common, but at home you can grow crystals on your own, for this you will not need so many improvised means. But the result will be simply stunning and fast enough. Within a few days you will be able to admire your own salt crystal of an unusual bizarre shape.
salt crystal
To understand how to grow a crystal from salt at home, you do not need special skills or knowledge, enough care and desire, of course. So, you will need:
Glass vessel.
Wooden stick, pencil or similar object.
If you do not have salt on hand, there is a simple alternative way - just use sugar instead of salt. In fact, this process is absolutely identical to how to grow a crystal from salt at home. So you can choose the main material to your liking.
Pour into a container of water. Best suited, but you can use regular tap water.

Add a small amount of salt and stir. Repeat this procedure until the salt no longer dissolves. You will understand this by the precipitation.

Pour the salt solution into a glass jar or glass so that no sediment remains.
Choose a large salt crystal and put it on the bottom of the jar. For best results, instead attach the crystal to a string and hang it on a pencil so that the thread does not touch the sides of the glass container.

Put the workpiece in a room with normal humidity (you can not put the jar in the bathroom or kitchen) and wait. Due to the fact that the selected container is glass, you can follow the process and wait for the desired result.
How to grow a crystal from copper sulfate
For those who want something more interesting, there is an opportunity to grow a beautiful structure in a rich blue color. To do this, we will tell you how to grow a crystal from copper sulfate. It should be noted that this substance is copper sulfate or copper salt, but the process of growing a crystal is still different from how to grow a crystal from salt at home. The thing is that copper sulfate is a rather dangerous chemical element, which means that it must be handled with caution. You will need:
Copper vitriol.
Heat-resistant flask for chemical experiments or glass jar.
A piece of copper wire.
Sandpaper.
Ballpoint pen refill.
Rubber gloves.
Get to work, making sure that copper sulfate does not get to small children and pets. Prepare your materials and start your experiment:
Put on gloves before starting work.

If you are using pure copper sulfate from a reagent store, distilled water will do, for household copper salt use . Heat the water to 60-70 degrees Celsius.

Add copper sulphate a little at a time until a precipitate forms.

Pour the water into another container to clear the sediment from the solution.
Using sandpaper, clean the copper wire, give it the desired shape and tie it to the thread.
 By the way, if you do not have copper wire, you can grow a crystal from copper sulfate at home using a regular thread.
Using a ballpoint pen, attach the seed so that the wire does not touch the vessel wall.

Now leave for a few days and watch the result.
After your crystal has acquired the required shape, dry it and cover it with a colorless varnish so that over time the blue vitriol does not weather and the crystal does not disintegrate.
 Now you know how to grow a crystal from salt at home, and you can experiment. Use different forms of seed to create interesting crafts. You can add a little dye to the water with salt (both ordinary food coloring and ordinary gouache paints will do). Use the whole flight of fancy, and then ordinary crystals from improvised means can become designer jewelry!
Evgenia Smirnova
To send light into the depths of the human heart - this is the purpose of the artist
Content
Crystals have attracted man since ancient times. Almost all precious jewelry stones, with a few exceptions, are minerals with a clear crystal lattice. Modern technologies make it possible to grow artificial gems that do not differ from real ones in appearance and have the same structure. Surprisingly, not only minerals, but ordinary grains of salt or sugar are also crystals that can grow. How to make salt crystals yourself? Let's talk about this in more detail.
First you need to choose the substance that you want to form into a crystal. Experiments at home have shown that the easiest way is to use ordinary table salt. This method has an undoubted advantage - all the necessary components are literally at hand, without requiring the purchase or search for special components. Read the instructions carefully before starting the experiment. Different salts are suitable for the “little miracle”:

- marine;
- cooking;
- copper or iron sulfate;
- potassium chloride;
- potassium alum;
- potassium permanganate.
Exercise extreme caution when handling the substances used. You must immediately decide what result you want to get - one large single crystal or several smaller ones. To do this, you will have to use different technologies. Note that the growth of single crystals is simpler in execution. Important: the container in which our beautiful stone grows is unacceptable to shake and move, otherwise it will turn out to be of irregular shape. It is forbidden:
- without reason to remove the crystal from the vessel;
- use food coloring to add color;
- paint the surface of the finished "product" with paint.
How to grow a salt crystal at home
So you've decided to learn how to make a salt crystal. For a little preliminary practice, a ready-made crystal growing kit, which is sold in children's stores, is suitable. You will be able to carry out this process with your child. He will definitely enjoy the job. There is an express way to get what you are looking for in 1 day, but then you will get not one large, but several small crystals fused. If you are ready for the expectation and impressive results, we will tell you how to grow a crystal from table salt.
Necessary materials and tools
For the intended experience, it is necessary to prepare a set of required materials, which should contain:

- two transparent containers (so that we can observe the growth);
- the substance that we will use for growing (in our case, this is table salt);
- stick or tablespoon;
- funnel;
- filter paper;
- a thread, and better, if any, a thin copper wire;
- lots of time and patience.
Step-by-step instruction
All the necessary materials are prepared, it's time to start making a grain of salt with a magic stone. What is the basic principle of how a small crystal becomes large? A small grain is added to a saturated solution of a substance, and the molecules begin to stick to it. The crystal is growing. In order for the molecules to stick, you need to cool the liquid or evaporate it. The slow cooling method achieves a faster result. We bring to your attention instructions on how to make crystals from table salt:

- In a glass container (it is better not to use a plastic one), we prepare a saturated saline solution. Add salt to hot water, mix thoroughly (36-38 grams of salt is required per 100 grams of water heated to a temperature of 80 °).
- The finished solution must be allowed to cool. An hour after that, it must be filtered - using a funnel with cotton wool or special filter paper.
- The composition that has stood for several hours is filtered again.
- We tie a larger grain of salt to a copper wire or thread and lower it inside the container. It should be suspended, not touching the bottom. The jar should be covered with paper to avoid dust.
- After a day or two, the bottom, walls, and the wire itself are overgrown with many small crystals. We take the second vessel, carefully move our embryo there and pour the liquid.
- The remaining crystals are again filled with water, and then all the time we maintain the liquid level in the jar with a growing crystal. Approximately once a week, the solution must be filtered from the precipitated crystals.
- After a few days, growth will become clearly noticeable. Continue growing as long as you want until you get the desired result. Then carefully remove the miracle stone, rinse gently and cover with colorless nail polish to give strength.
Video tutorials: how to grow a crystal at home
You already know what you can grow a crystal from. Having done experiments with familiar substances, try experimenting with reagents. It can be alum, yellow or red salt, blue vitriol, aluminum sulfate. An important point: try not to use too toxic reagents. At home, it is difficult to achieve the necessary ventilation and temperature for experiments. The video below shows how to grow interesting types of crystals using available substances.
Growing crystals is possible not only in a chemical laboratory, but also at home. This is an interesting and exciting activity that will surely cause excitement not only in a child, but also in an adult. Watching the formation and gradual growth of a crystalline mass is very entertaining, especially since this does not require expensive substances or special skills.
In how to grow a crystal at home, ordinary table salt will help. Moreover, we need not "Extra", but a stone one. You should not use an iodized product, since it practically does not crystallize. Sugar, soda or copper sulphate can also be used for this purpose. If you want to get a colored pebble, you should color the product with manganese or any household dye.
An artificial crystal can be used as an interior decoration; for a child, this is a great opportunity to make a beautiful little thing with your own hands. That is why interest in the creation of such elements has recently been increasing more and more.
How to grow a crystal at home
The easiest way is to buy a special kit for growing crystals in the store. It can be sold in a children's supermarket or in a specialized place that sells school supplies and everything you need for the educational process.

Alternatively, the crystal can be obtained from readily available powdered products such as salt and sugar and soda. Everything you need should be prepared in advance in order to simplify the process of artificial origin of the monolith as much as possible. Be patient, because the formation of a full-fledged stone will take at least a month, and sometimes even more. The longer you wait, the more massive and beautiful your creation will turn out.
To grow a crystal, you will need:
- A container (like an incubator) of such a volume that the future stone can accommodate. Its material should not oxidize or stain from contact with various substances. A deep glass dish is best, as it is transparent and allows you to observe the process. If there is none, you can take a ceramic product. Plastic, metal and other materials are not suitable.
- Wooden or glass stick for mixing the solution (like a vessel, it should not oxidize).
- Paper (thick napkins or special filter sheets).
- The basis of the future stone (salt, sugar, soda, or blue vitriol).
If you decide to grow a colored crystal, you can not do without a dye.
Technically, the algorithm for creating artificial stones is almost independent of what they are made of. But it is very important to strictly follow the sequence of actions, otherwise even after a month or two you will not see the desired result.
Step-by-step algorithm for growing a crystal from products

To turn salt or sugar into a single monolith, the following manipulations are needed:
- The product dissolves in boiling water to make a concentrated solution (the stronger it is, the more massive the crystal will be).
- The basis of the future crystal (sugar or salt) is gently washed under running water and then placed in the cooled solution. When washing, it is important not to crumble a piece of the product.
- For a day, the container with substances is tightly closed with a lid.
- A vessel with a crystal base and a solution is opened and left for 4-5 weeks, during which time the stone will reach a sufficient size.
As soon as the top of the crystal begins to peek out above the surface of the liquid, you should remove the pebble from the solution, rinse it and dry it, and then put it in a conspicuous place so that it decorates the room. Alternatively, it can be placed under a glass jar.
If patience is not your strong point, you can use the accelerated method of cultivating a salt crystal. It needs distilled water, salt and gauze. Stir the salty powder into the liquid until it no longer dissolves. Then the mixture is passed through cheesecloth and poured back into the vessel. From what is left in the gauze, the largest piece is selected, a thread is tied to it, then it is lowered into saline. It is advisable to cool everything to speed up crystallization. If a small pebble is enough for you, then it is really possible to get it in this way in a week.

The dye can be added at any stage of crystal growth. But if you want to make a stone of a saturated shade, it is worth dissolving the coloring matter at the same time as salt or sugar.
vitriol crystal

To create a dark blue vitriol crystal, you will need copper sulfate (sold in gardening stores and sometimes found in household chemical supermarkets) and distilled water. Liquid should be poured into a volumetric container (preferably made of glass or ceramics) and gradually, in portions, vitriol should be dissolved in it. This is done until the substance introduced into the solution ceases to dissolve in it.

Then an ordinary thread is lowered into the vessel. It is necessary that one end hangs outward from the outer edge of the container. After a few hours, small pebbles cling to it. You need to leave the largest one, and carefully clean the rest. After that, the thread with a small crystal returns to the solution, but so that it does not touch the bottom of the container. In a few weeks, the artificial conglomerate will become massive enough to get it out, rinse it in water, dry it and enjoy the man-made beauty. In a month, you will form a stone about 3x4 centimeters in size. To create a more massive product, you will have to wait longer.
You need to understand that copper sulfate is a dangerous chemical, so children can only work with it under the vigilant guidance of adults. The dried pebble should be covered with colorless nail polish on top - this will help keep it in its original state longer.
Artificial crystals are quite fragile, so you need to handle them very carefully. If you accidentally drop such a little thing, most likely, it will break and then you will have to grow the crystal again.
Read also


